Showing posts with label Beauty. Show all posts

Wednesday, March 13, 2013

DIY Wednesday: Be Your Own Personal Stylist by Asheville, NC Wedding and Portrait Photographer

Today's post might be a "yeah DUH," moment for some, but for me I was truly happy to figure this little method out.  I have always struggled with what to wear each day and I would try on multiple outfits and still sometimes not know what I wanted to wear :) My go to stylist used to be my older sister when we still lived with our parents, but in the years since we got married and moved into houses of our own, I have had to learn how to style my own outfits.  When pinterest came along I so quickly became a huge fan of it just like everyone else, but I quickly realized that I could use it as more than just a tool for session ideas or ways to decorate my home, I could use it to essentially be my own personal stylist!! 

On pinterest I have two different outfit idea boards: one board for cold weather outfits (Fall/Winter outfits) and one board for warm weather outfits (Spring/Summer Outfits).  You can check them out here: Fall/Winter Outfit Ideas and Spring/Summer Outfit Ideas.  The way I use my outfit boards and really make them work for my closet, is I go to my closet pick out a piece of clothing that I love, like for example: red skinny jeans and then type it in on pinterest and see all the results it brings up.  I will then go through the results and pin outfits that I feel like I can recreate with clothing pieces in my closet. Now granted, sometimes the resulting outfits I come up with do not look exactly like the outfits I pinned on pinterest, but they usually end up looking really cute and it helps me cut down the time each day that it takes me to get dressed.  Here are some outfit ideas I have styled with the help of pinterest :) 

Images of outfits that young twenties something girl has styled with the help of pinterest

Now that you know my secret, I'd love to see outfits you've styled with the help of pinterest :) comment below with a picture of one!! 

Wednesday, March 6, 2013

DIY Wednesday: Homemade Lip Exfoliator by Asheville, NC Wedding and Portrait Photographer

I took a little hiatus from DIY Wednesday last week, but this week I am BACK and today's post is on a deliciously easy way to make your own lip exfoliator. We are coming up on the tail end of Winter here in the mountains of North Carolina and my lips are definitely showing the signs of a long, cold, windy Winter! I'm a burt's bees addict, my favorite kind is the pomegranate kind because it nourishes my lips and gives them a little pop of color as well, but the winter has been really harsh on my lips and they needed something more than just chapstick to keep them soft and kissable so....I decided to make this very simple lip exfoliator.  I found the original recipe on one of my favorite clothing websites in the world Modcloth!

You Will Need
Honey
Olive Oil
Brown Sugar
Little mixing bowls (I got my tiny multi-colored ones from Ikea)
Mixing Spoon
Mason jar or other small container to put the finished product in.

Step 1: Measure out equal parts of brown sugar, honey, and olive oil and put them in little mixing bowls.


Photo of honey, brown sugar, and olive oil to use in DIY lip exfoliator.

Photo of mixing bowls from Ikea and mason jar.

Step 2: Take mason jars, pour contents in bowls into mason jar and mix well.

Photo of lip exfoliator mixture in mason jar.


Step 3: Using your fingers or q-tip spread lip exfoliator mixture on your lips, rub together lips to really mix in mixture on your lips and get the full effect (it will feel a bit nitty gritty) and then wash off the mixture or lick it off (it is in fact made out of all edible products :)

Photo of girl puckering her lips.

Photo of girl with DIY lip exfoliator treatment on her lips and then washed off of her lips and smiling.


Wednesday, February 6, 2013

DIY Wednesday: Eye Makeup Remover by Asheville, NC Portrait Photographer

Today I am excited to share my 2nd DIY Wednesday Post on how to make your own eye makeup remover.  :) I believe in giving credit where credit is due, so it is only right that I credit this wonderful blog kristanlynn with the recipe for this wonderful eye makeup remover.  I am always looking for ways to save money and live more simply, so I was delighted when I started discovering all of these wonderful DIY beauty recipes on pinterest. If you are a girl you know just how expensive makeup and beauty products can be, I don't remember a time that I ever paid less than $5.00 for makeup remover at the store.  If I did my math correctly (math has never been my forte lol), then you can make this eye makeup for less than $2.50 a jar!!!  The recipe for this eye makeup remover is quite simple and one of the great things about making your own beauty products is that you will know exactly what you are putting on your face when you go to use them.

You Will Need
1 1/2 tablespoon of baby shampoo or body wash (I bought mine from ALDI)
1/8 teaspoon of olive oil or coconut oil (I chose to use olive oil because I already had it at home)
1 cup of water
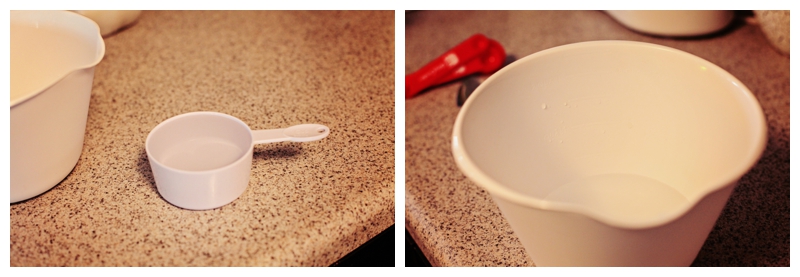
measuring spoons and cup
mixing bowl
spoon
bottle or jar to put finished product in

Step 1: Assemble all your supplies.


Step 2: In your mixing bowl measure out one cup of water and add it into the bowl.


Step 3: Measure out 1 1/2 tablespoon of baby shampoo/bodywash and pour into mixing bowl.


Step 4: Measure of 1/8 teaspoon of olive oil (or coconut oil) and add into mixing bowl.  Stir together all the ingredients.


  Step 5: Pour the mixture in your mixing bowl into a glass jar or container to store.  I used a mason jar I had lying around my kitchen and an empty pesto jar (if you are going to use a jar that had food in it previously, I recommend soaking it, so that it won't have a strange smell).


Last but not least, try it out and enjoy! ;)